Wheel Testing
Module Goal: learn which pins make both motors run the wheels in a forward direction.
So…It’s time to do some simple programming!
Time to Get Python-ic 
We’re going to have a class learning session devoted to the Python computer language. But, for now this guide will just give you the words to type. Just follow along!
Get your Kano & Raspberry Pi connected and make sure you’ve got your VNC Session active.
- Don’t remember how to do this? Review to the Raspberry Pi Comms module.
NOTE: Don’t connect the AA batteries to the L298N Motor Controller board yet.
On the Raspberry Pi:
- Open
code-oss - Click Open Folder…
- Click Home on the left menu bar
- Click robotics_class (or a folder named something like this)
- Click OK
Now, let’s open a new file and write some Python code.
- Click New file…
- Add this to the file the following python code:
#!/bin/python3

# Our first test module

from gpiozero import Robot
import time

robby = Robot(left=(7, 8), right=(9, 10))

robby.forward()
time.sleep(20)
robby.stop()
- Click File -> Save to save this file
- Save the file as
robby.py
Congratulations! You’ve just written some Python code.
Now, let’s run this code and see what it does!
Connect the 4 AA batteries so that the L298N Motor Controller board has electrical power. It should have a bright red light if you’ve got the batteries connected correctly.
-
Not working? Double-check your wire connections from the wheel assembly module.
-
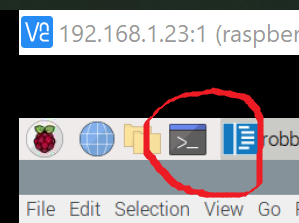
Open the terminal on the Pi by clicking the icon shown in this pictue:
In the terminal, type:
- Change directories by typing
cd robotics_classand then Enter - Show all the files in this folder by typing
lsand then Enter
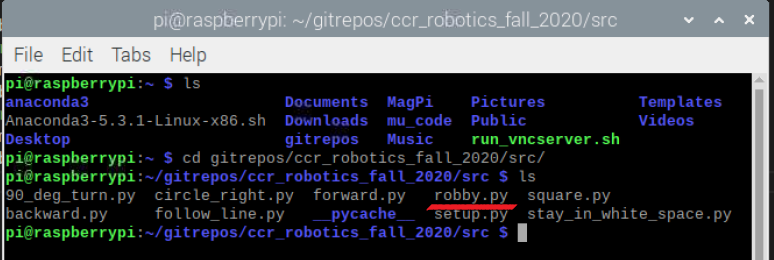
This should show you a list of files. You should see the file you created above: robby.py. Like the red underlined file in the pic below.
- If you don’t, ask Mr. Bowman for help.
In the terminal, type:
python3 robby.pyand Enter
Your wheels should start turning!
- If your wheels don’t start turning, double check that the batteries are connected and that the L298N Motor Controller board has its red light on.
Which Way Is Forward?
The wheels should stop spinning after 20 seconds. After they have stopped spinning, have a team discussion about which way the yellow motors should spin in order to create forward motion. Think through where they will be on the chassis (the wooden board) and which direction you marked as forward on your chassis. Once you have agreed…
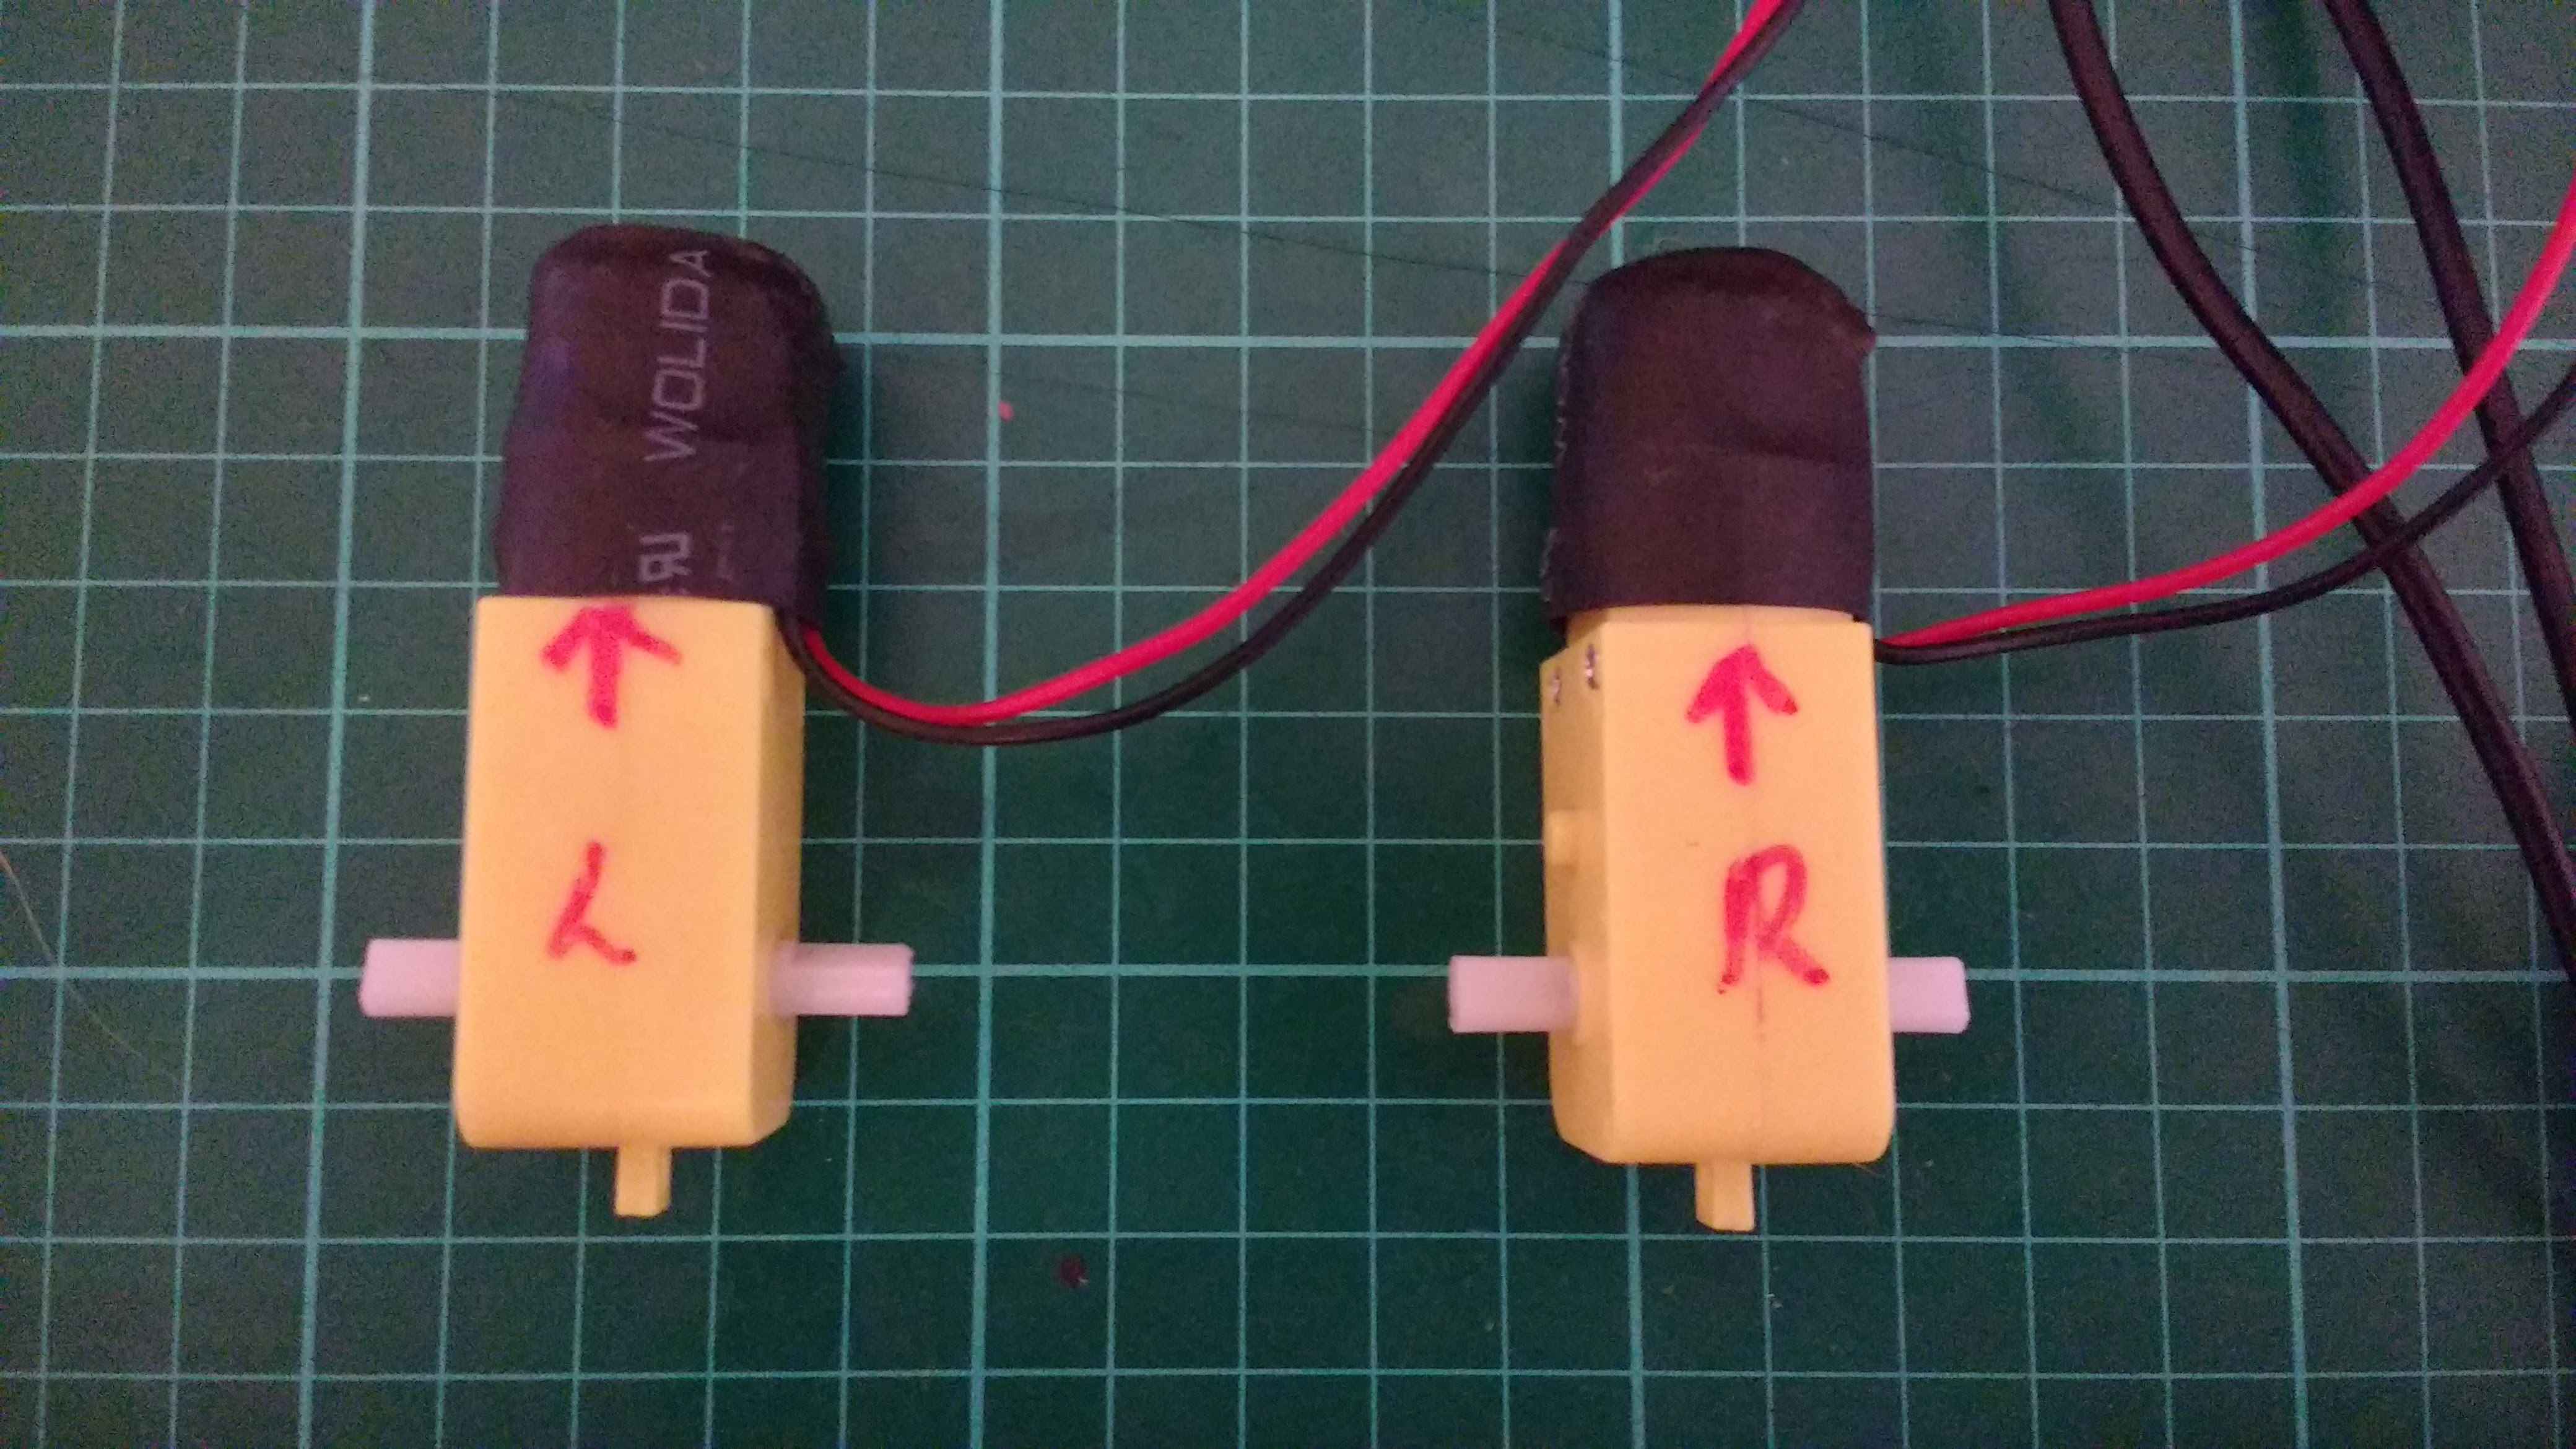
On each yellow wheel motor:
- Mark the forward direction with your Sharpie.
- Mark the side:
leftorright
Like this, but make sure you get your arrows pointing in the correct direction for your design:
Now, run the python code again and see if the wheels are spinning in the correct direction.
Tip: In the terminal window, you can use the up arrow to get to a previously typed command. Try it!
If the wheels are spinning in the correct direction, then you just got super lucky. Congratulate your team on a job accidentally well-done. :grin:
But, the wheels probably aren’t spinning the correct direction. You can fix this in the Python code!
Change the Direction of the Left Wheel
Look back at the code that you wrote. Find the left=(7, 8). If your left wheel is spinning backwards, then reverse the numbers. Like this: left=(8, 7). Make sure you save the code after you have modified it. Then run the python code again in the terminal.
Change the Direction of the Right Wheel
Look back at the code that you wrote. Find the right=(9, 10). If your left wheel is spinning backwards, then reverse the numbers. Like this: right=(10, 9). Make sure you save the code after you have modified it. Then run the python code again in the terminal.
Question: Instead of modifying the code to make your wheels spin in the correct direction, what other action could you have taken? Think it through. This is a wired device!
Once you have both wheels spinning in the correct direction for forward, write down some notes for your future self.
- the left and right numbers in your code
- the color of the wires and which GPIO pins they are connected to on the Raspberry Pi.
Module Complete